How to Color Correct and Balance Your Images for Printing Created: Jun 10, 2024
What is Color Correction?
When you order through most photo print labs, you will sometimes be presented with the option to "color correct" or "color balance" your files. Most do not know what this means but if it's a cheap option that will improve their prints, most won't mind the small added cost.
Color correcting simply means to balance out the colors in your image. This can mean removing a color cast from the image or bringing out colors to have more definition and vibrancy. When you have a print lab do this color correction service, it is typically a very fast, easy technique. After all, you usually get what you pay for, and if it's only a few dollars, you're not going to get some image manipulation wizard work for hours on your file. Instead, they will typically apply a quick and easy method that we will show you below. This requires no image editing experience. There are many ways to color correct, we will only be showing you one of the easier methods.
How can I color Correct My Own Images?
Many photographers think that color correction is something only a very advanced Photoshop user can do. Not many realize it can be done using some very basic functions within Photoshop which offers several color correction algorithms.
What you will need:
- Adobe Photoshop (any version)
- A file that you want to color balance
- A few minutes of your time
For this demonstration, I just randomly picked a photo from a free online stock photo website so you can follow along and apply the same methods in this tutorial to the same file. You can download the image here
After you have downloaded the image and have it open in photoshop, the first thing you want to make sure of is that the photo has a color profile. You can check what profile you have a couple of different ways. For this article we are going to use Convert to Profile tool. You can get to this tool by doing to Edit > Convert To Profile. At the top under Source Space you will see where it says profile. We can see this file has sRGB associated with it so we are good to proceed. At Shiny Prints we recommend using either AdobeRGB 1998 or sRGB. If your image is not one of these profiles then you can go to where it says Destination Space and change it to one of the suggested profiles.
Next, we are going to edit the color of this image. You can do this two ways that will get you the same results. One way uses multiple layers and the other uses adjustment layers. Adjustment layers are a non-destructive form of editing. This is because you make on adjustments using a layer special layer that can make color adjustments to your layer without permanently changing the layer or pixels beneath it.
Using Multiple Layers
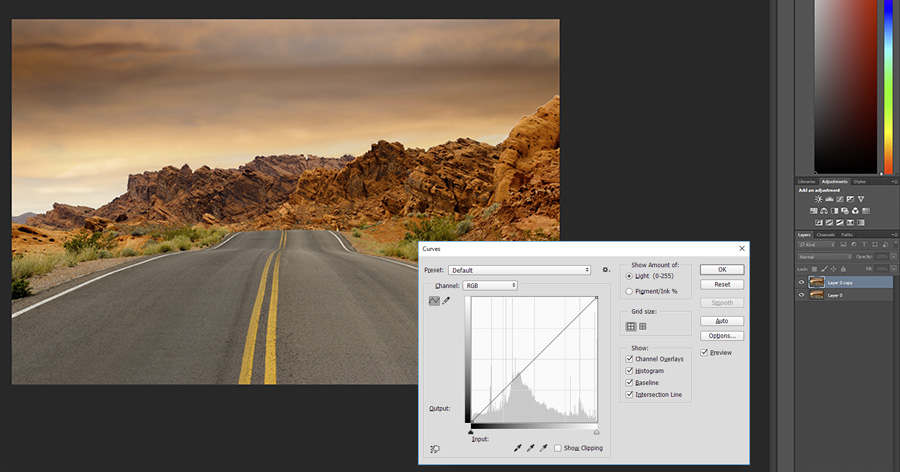
To use the first technique with multiple layers, you will need to duplicate the layer by right-clicking on it on a PC or ctrl+clicking on a MAC onto the layer you want to duplicate. Select "Duplicate Layer" in the menu. This is the layer we will be making our color balancing edits to and by making it on a new layer, we will be able to turn that layer on and off to compare it to the original.
Next, you will want to click on the top tool menu under image > adjustments > curves. You will see the Curves dialog box appear with a bunch of options. We are going to be focusing on the options.. button. Once you click on options, another dialog box will appear titled "Auto Color Correction Options". You will notice right away that once this dialog appeared, the colors in your image have shifted. You will be presented with 4 options that photoshop calls "algorithms". There really is no right or wrong options here or one that works better than the others, this all comes down to your personal preference.
Using Adjustment Layers
To use the second technique, Go to Layer > Adjustment Layers > Curves. This will add a Curves Adjustment layer over your original layer. This technique is slightly different from the first one we just discussed. The only difference is that you will notice there is no Options button. You have to hold the Alt key on a PC or the Option button on the Mac and click on the Auto button. "Auto Color Correction Options". You will notice right away that once this dialog appeared, the colors in your image have shifted. You will be presented with 4 options that photoshop calls "algorithms".
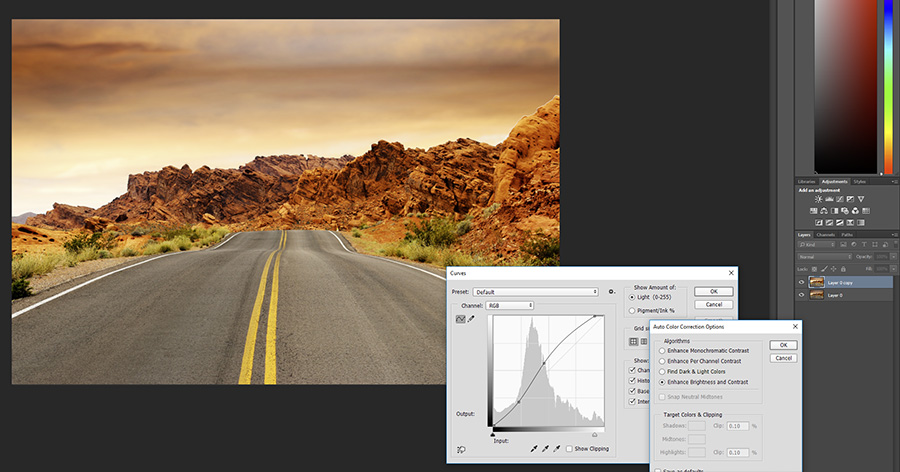
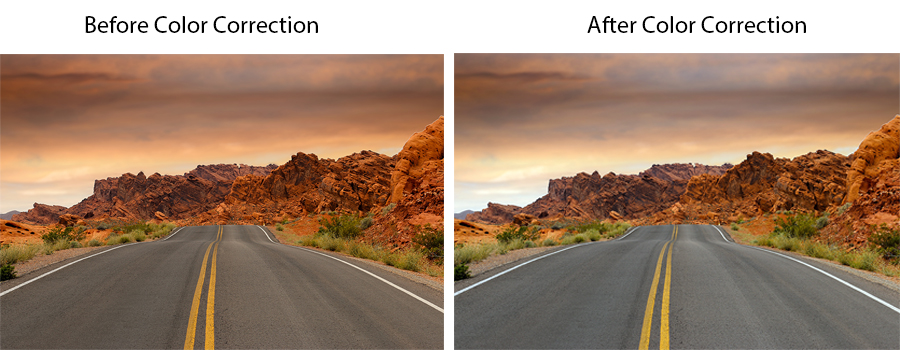
Click on the 4 different Auto Color Correction options to see the different changes each one applies to the image. I like the "Find Dark & Light colors" and "Enhance Per Channel Contrast" options the best. These both remove that magenta color cast from the image and make the colors appear a lot more natural and lifelike, especially the concrete road. I like the Enhance per channel option a little better since it offers a bit more contrast.
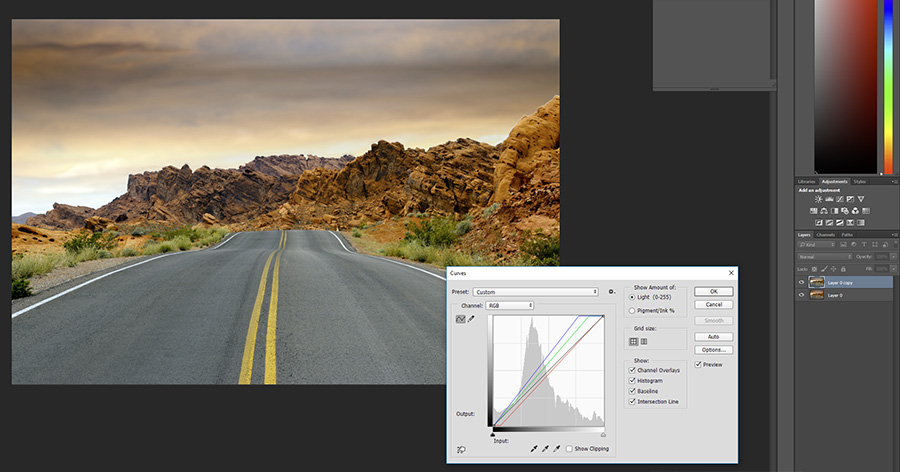
When we hit ok, we can see the changes the algorithm made to the color channels. Hit ok to close the Curves dialog box. Next, you can turn on and off the adjusted layer to compare it to the original. You can clearly see this is a big improvement in the file with just a very small amount of time and effort.