How to Place an Order on Shiny Prints Created: Jun 10, 2024
Step 1. Click Upload and Create
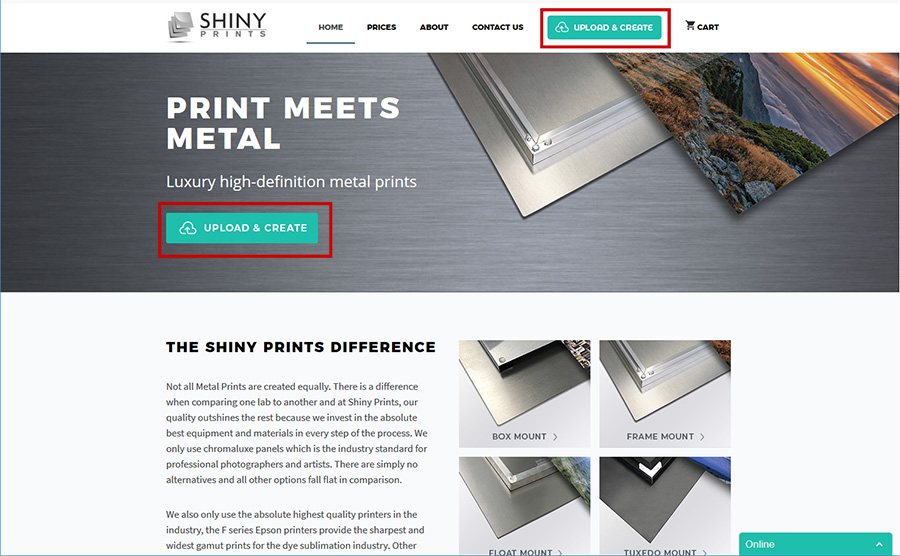
To get started in placing an order on our website, you first need to click on the "Upload & Create" button found at the top of our website menu which can be seen in the above images highlighted in red. This will initiate the ordering process.
Step 2.
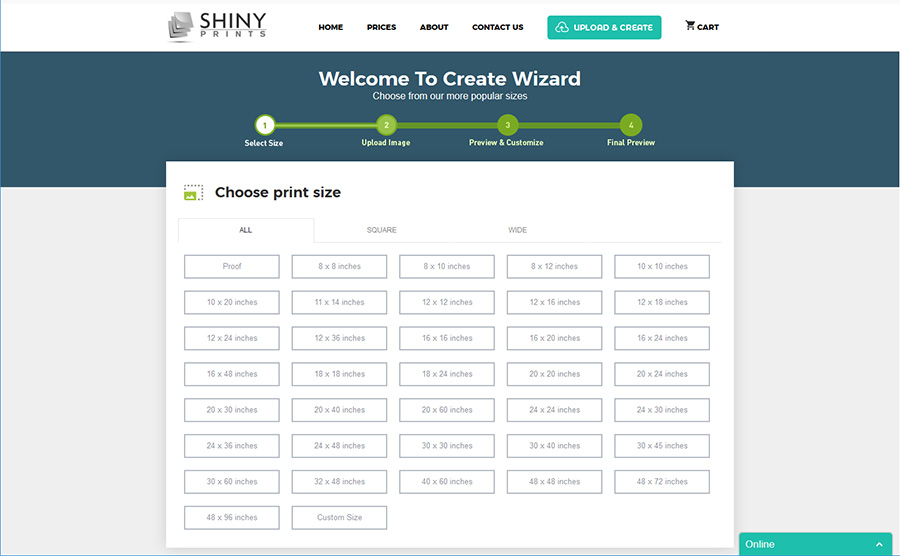
Next, you will need to select the size of the print you would like to purchase. If you do not know for sure which size, that's ok, you can change this later on the wizard screen. Select any size such as a 16x24 to proceed.
For custom size prints, be sure to select the "custom" option at the very bottom. Once you click custom, a new window with two fields will appear for you to enter your custom width and height. You can change this later in the ordering process.
Step 3. Upload File
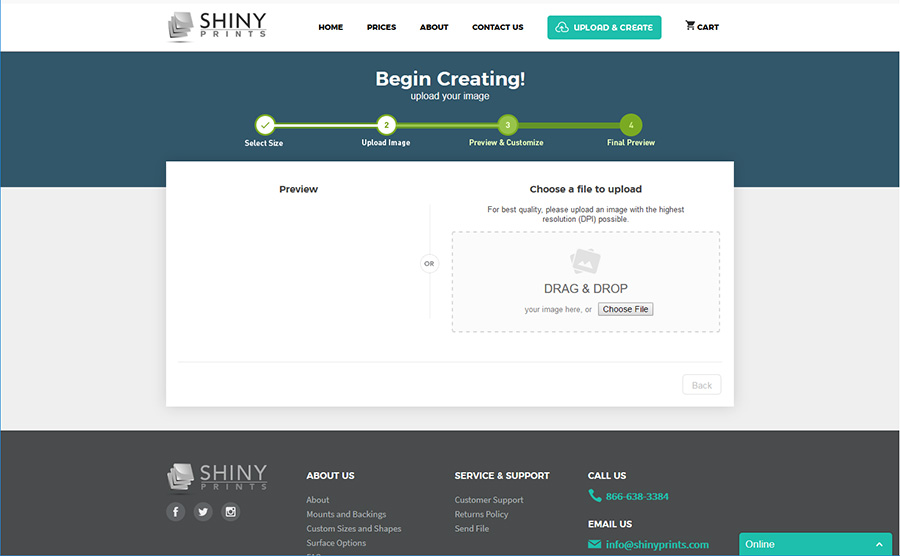
Upload the file you would like to use to place your order. Our website accepts both TIF and Jpeg file formats and allows files up to 2GB. You can either browse your computer to locate the file, or you can drag the file(s) into the browser screen into the "drag and drop" box that has a dotted outline.
Step 4. Preview Photo
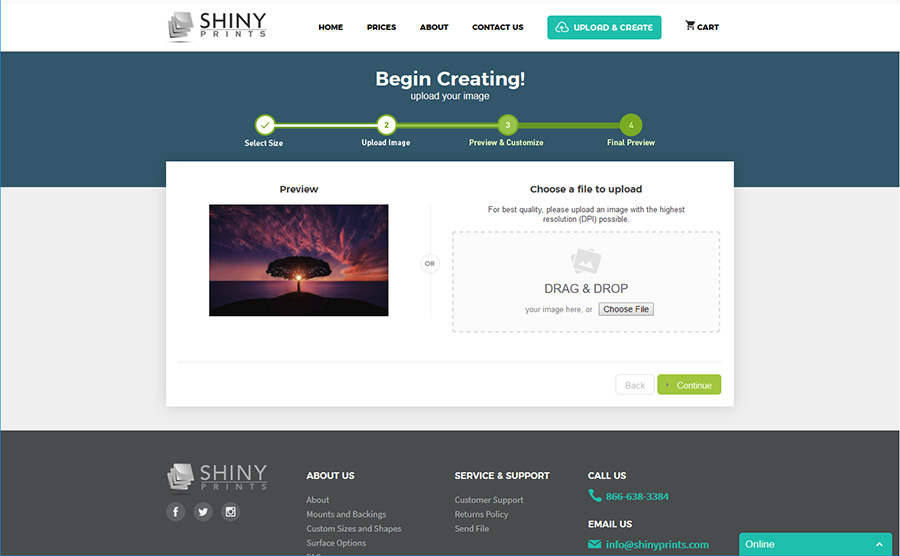
This is to preview the file you just uploaded. Confirm this is the correct image, then click continue to proceed to the next step. If your image is below the recommended resolution for the size you selected, a warning box may appear for you to check to proceed to remove liability from shiny prints.
Step 5. Crop Wizard
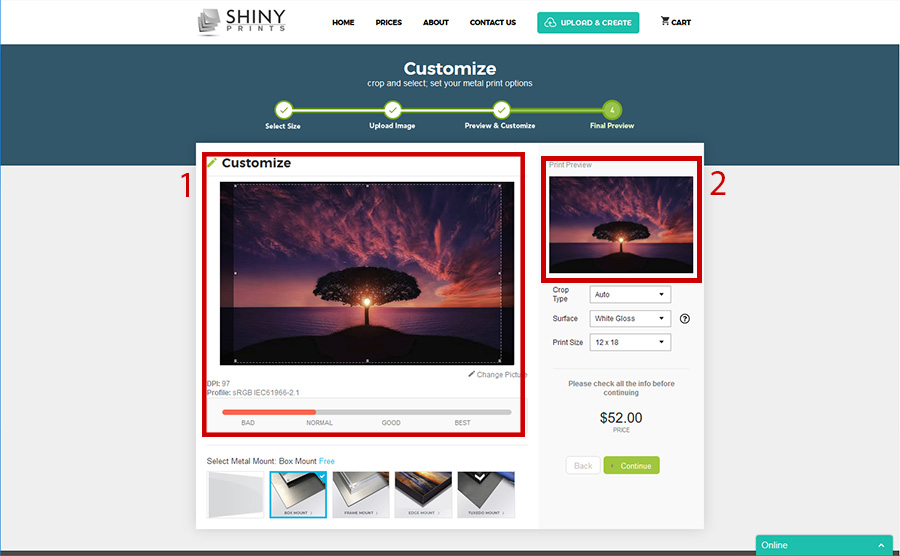
1. On the crop part of the order process is where you will crop (if necessary) your image. Click and drag the selection border to resize the crop. You can also click and drag the box to control what part of your image gets cropped. The print preview will be located on the right side.
2. On the right side, you will see a preview of how your cropped image will print. Make sure that any signatures or important elements are located at least 1/4" away from any edges to avoid them getting cut off due to bleed.
STEP 6. Select Print Surface, Crop Type and Change Size
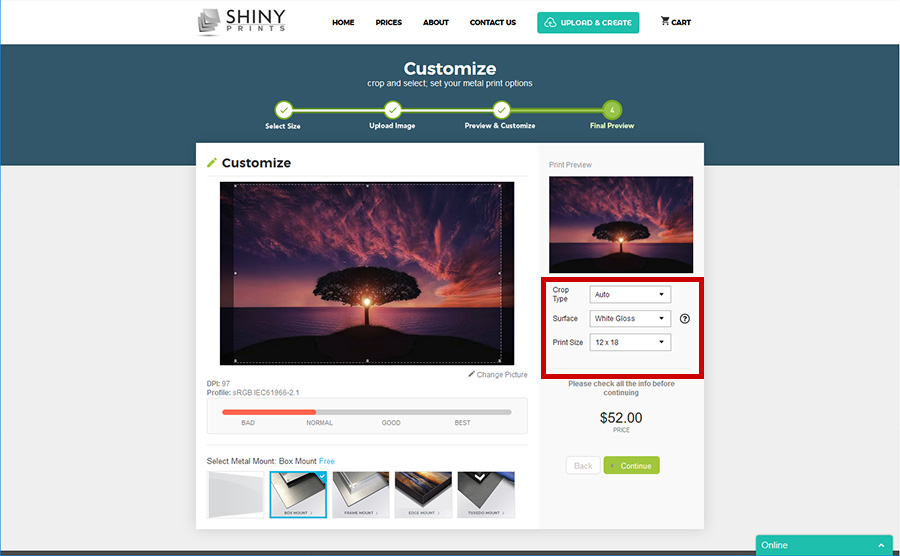
Crop type
Most of the time, you can leave this as default, the system will automatically detect which orientation your file is. You can select horizontal if you would like to crop a horizontal section from your photo, or vertical crop from a horizontal image.
Surface Select
Select from the drop-down of our different surface options. The white gloss surface option is selected by default because it is our most popular surface and what we print on over 90% of the time. If this is your first time ordering with us or ordering a metal print, this is the surface we recommend you print first. Click here to see a detailed explanation of all our surface options
Print Size
This option is where you can change the size of your print. If you change to a larger size, the quality meter will go down, and if you're going smaller, it will go up. This is the last time you will be able to change the print size before adding your print to the shopping cart.
Sep 7. Select Mount
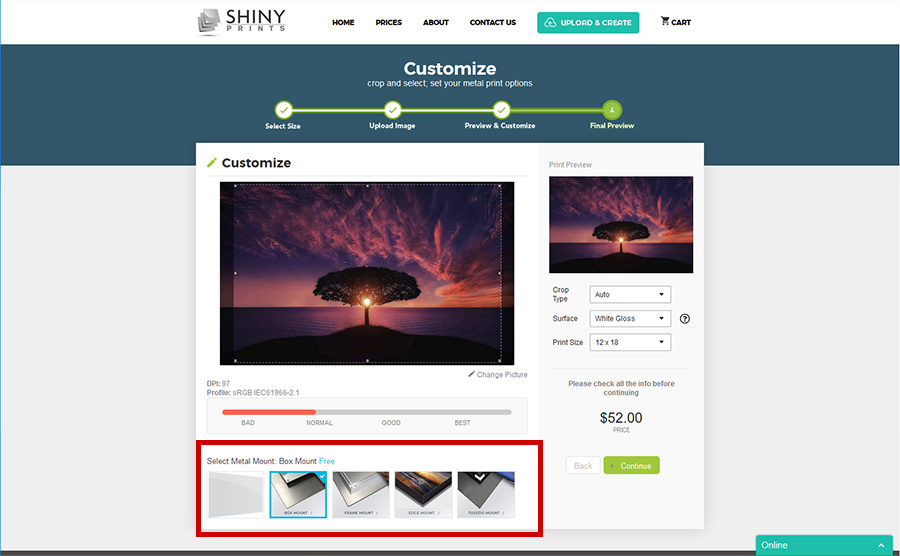
In order to add your print to your cart, you must select a mount option. You have the option to select no mount, box mount (for prints smaller than 20" x 30") and our upgrade options such as the edge mount and tuxedo mount. When clicking on a mount option, it will show you the associated cost for each mount. The standard box mount and frame mount are both free. Click here to learn more about our mounting and framing options. Press "continue" when you are satisfied with your crop, size and other options.
Step 8. Final preview before adding to cart
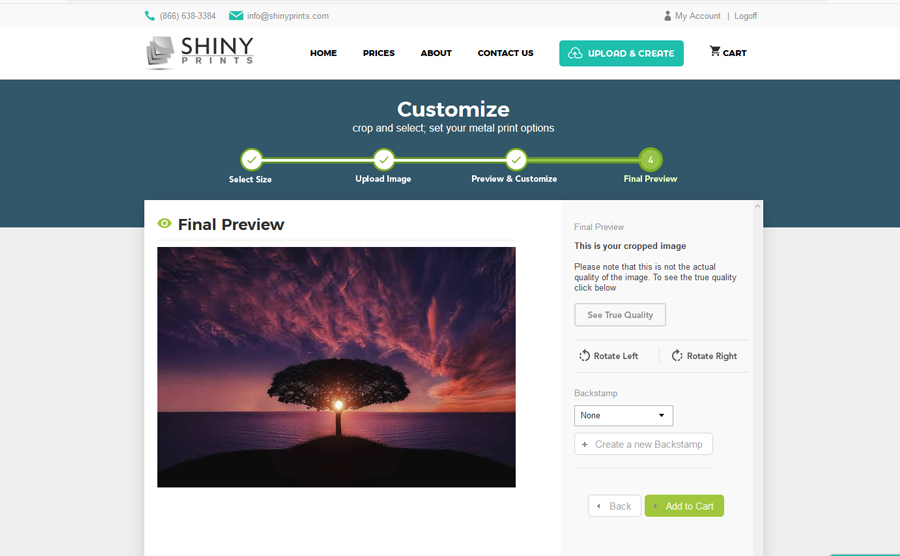
Once you have selected all of your print options and press "continue", you will be taken to the final preview screen. Here you can take one last look at your crop to make sure you're not losing any important details. You can also view your image in it's full resolution by clicking on the "see True Quality" link. This is also the section where you can optionally create or add a backstamp on the back of your print for branding purposes. The backstamp option will only be available for all mount options except the box mount. If you have a smaller print that you want to have the backstamp, you will need to upgrade to the premium frame mount.
When you are ready to proceed, press the "add to cart" button to begin the checkout process.
Step 9. Logging in or Creating a new account.
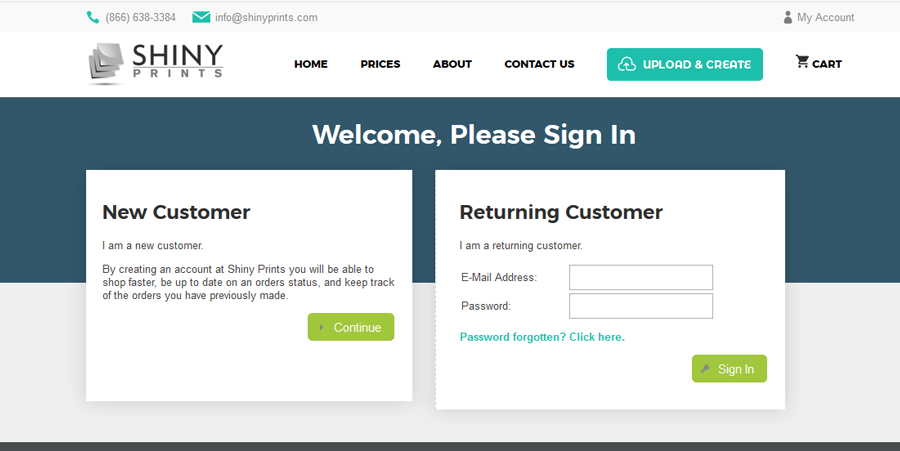
In order to place an order with Shiny Prints, you will need an account. Signing up for an account is free and there is no approval process unless if you would like to have a pro account.
If you are an existing customer, simply login with your email and password on the box on the right, and if you need to make a new account, click the continue button on the "New Customer" box on the left to quickly and easily create your account.
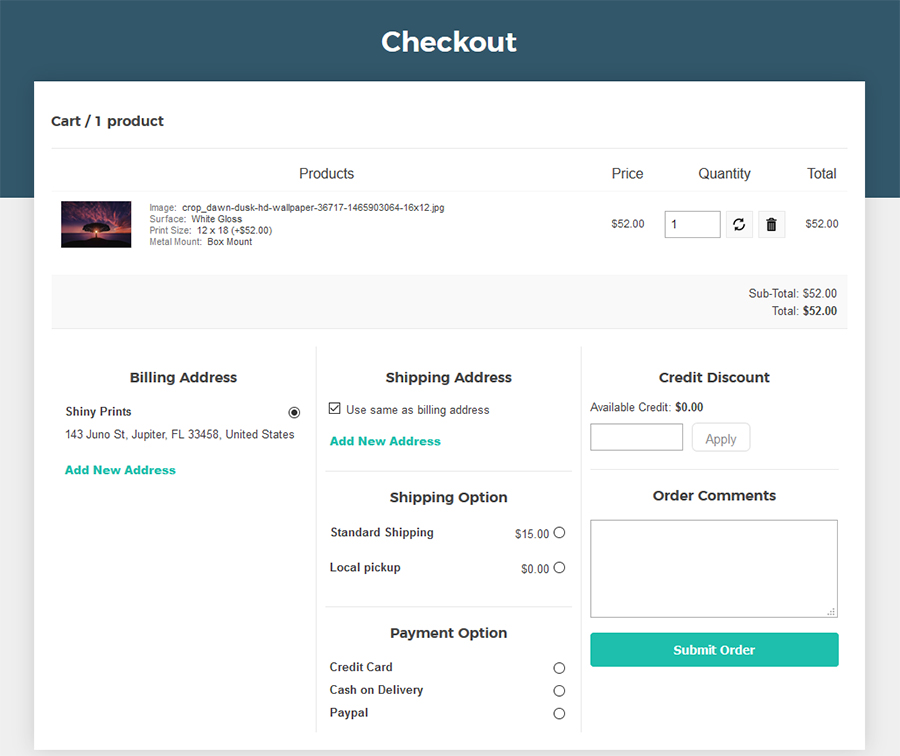
Step 10. Viewing your shopping cart and proceeding to checkout.
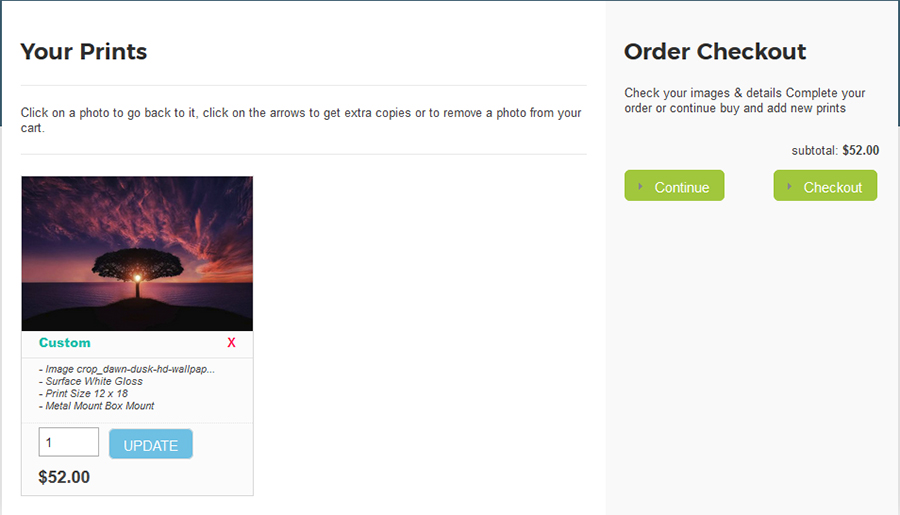 After you have added your items to your shopping cart, it is important to review all details to make sure you get your order right. Make sure each cart item has all the correct information listed under your print thumbnail image. Review the Surface option, the size of the print and the mount option for accuracy.
If you would like to add more prints to your shopping cart, you can press the "continue" button which will bring you back to the ordering process.
If you would like to proceed to checking out and completing oyur order, press the "Checkout" button.
Step 11. Completing Checkout.