How to Prepare a Photo for Printing
Creating a high-quality metal print from a photo isn’t quite as straightforward as you might imagine. We do our best to help and guide you, but a part of the process has to be done by you as a photographer. It is not as simple as snapping a photo and sending it to be printed. Although it can be done, especially with today’s technology, you certainly won’t be 100% pleased with the results.
Professional photographers edit their photos before doing anything else to get the most from them; to get a metal print-worthy piece that’s worth hanging on a wall for the next fifty years. However, even a completely edited photo is not yet ready to be printed.
There are steps you can take to ensure that the print turns out precisely as you imagine it, and as close to what you see on your screen as possible. If you have at least some experience as a photographer, you must have noticed that some photos simply look better online than when printed. There are many reasons behind it: resolution, color balance, inappropriate export settings, and even your monitor. However, it all comes down to one point: the photo wasn’t prepared for printing.
Don’t worry, Shiny Prints is here to help you along the way. It doesn’t take an expert to prepare a photo for printing. It is quite easy and you can do it too! Some photo labs will give you the option to pay extra for the service of preparing your photos, but remember that you can do it too, and invest even more care into them. After all, they are your photos.
Here is a short guide that will explain what you need to do to correctly prepare your photos for print.
Monitor Calibration
The first step may not have anything to do with printing directly, but it is something that all photographers should do. In fact, even if you don’t plan to print your photos, calibrating your monitor is still important.
You probably noticed that your photos look different when viewed on different devices and mediums. This is because all computer monitors and displays have their color balance, brightness, and contrast set differently. How will you then know which screen is displaying your photo correctly? How do you know after post-processing your photos that you have the right amount of saturation or exposure? The only way to know it for sure is by calibrating your monitor.
Monitor calibration is all about adjusting the colors to be as close as possible to global standards. But keep in mind that it is not enough to calibrate your monitor only once. For optimal results, you will have to do it once a month, or even more often if your monitor is older. Monitors tend to lose color balance over time. Frequent calibration is extremely important when it comes to printing to make sure the print looks exactly the way you see the photo on your screen.
Many free online tools can help you calibrate your monitor, and although they are not precise, they are better than nothing. But the best thing you can do for your photography is to invest in color calibration hardware, which will help you to professionally dial in the colors. These tools come in various price ranges, and sometimes are even more expensive than the monitor itself. However, they are an investment that is worth it for most photographers.
There are two types of calibration tools: colorimeters and spectrophotometers. Colorimeters are cheaper and simpler in design, yet still perfectly good for calibrating monitors for hobbyist photographers. On the other hand, spectrophotometers are pricey, often even above $1,000. They are intended for professional monitor calibration and printing labs. Fortunately, some photographers, studios or printing labs near you may offer calibration services in exchange for a moderate fee.
We advise you to have your monitor calibrated if you already noticed that your prints don’t match your monitor. However, there might be other reasons why your prints don’t match your monitor.
Crop Your Photos to Match the Print’s Aspect Ratio
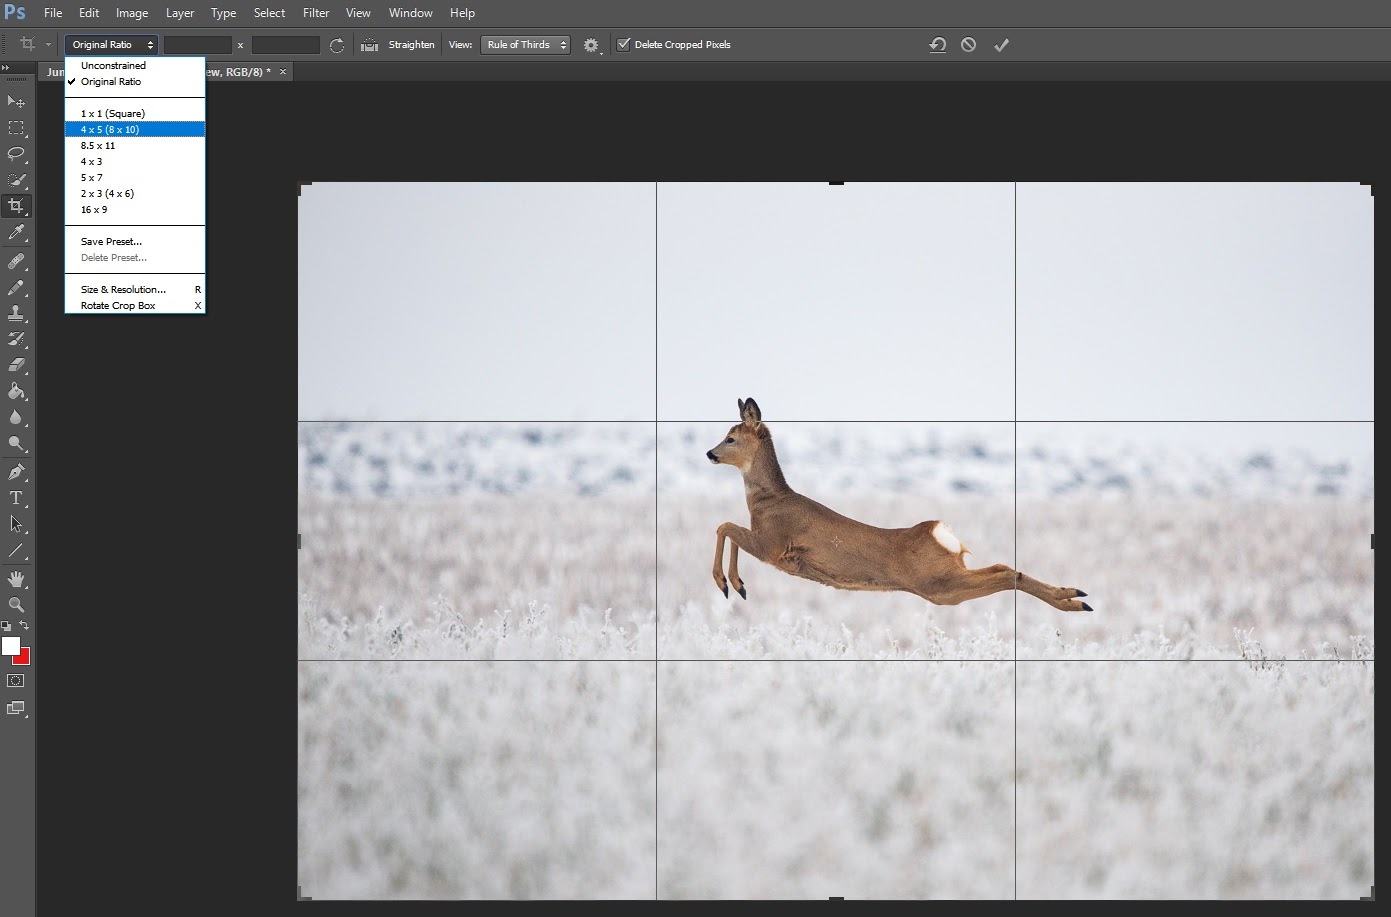
When you decide to print your photo, the first thing you need to do is choose the size of the print. All sizes have their respectable aspect ratios, and if your photo doesn’t match the aspect ratio of a print, the photo will look like it’s stretched. You can simply crop your photo to fit the print perfectly, and then you won’t have to worry about it. You can do this in any photo editing software. For example, if you need your photo to fit on a print that is 8×10, crop it to a 4:5 aspect ratio. Some of the programs will offer the most commonly used aspect ratios, and you can set it with just one click. For example, in Photoshop you can click on the “Crop Tool”, then select the aspect ratio from the menu in the upper left corner.
Use the Right Color Space (Adobe RGB or sRGB)
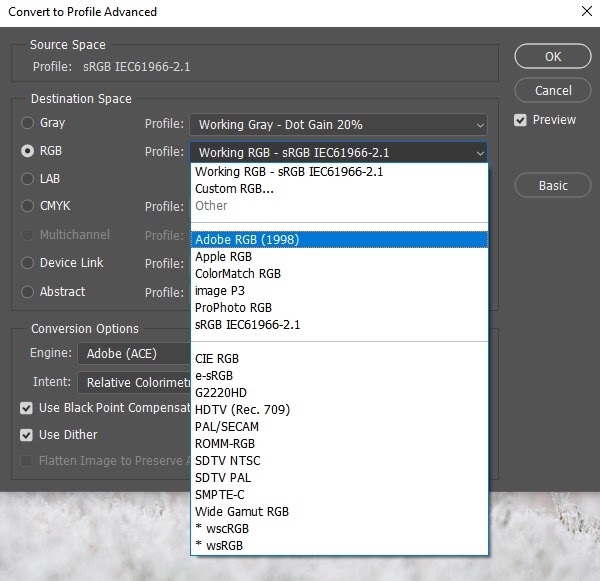
Many photographers think that if they save their photos using the ProPhoto RGB color profile, they would turn out better because this is a larger color space. But when it comes to printing, this is not true. Most printers out there can’t show such a wide range of colors. Most monitors can’t do it either. So what is the point? Your file will end up being large for no reason. Furthermore, printing using an inappropriate color space can lead to dull colors or a result that doesn’t match what you had in mind. The safest bet is to save your files in Adobe RGB or sRBG color space.
Here is how you can find these options in Photoshop. Go to the “Edit” tab, then click on “Convert to Profile”. Under the advanced settings, you will find the “Destination Space” section. Click on RGB and from the menu select “Adobe RGB (1998).”
If you want to learn more about color models, color spaces, and why we recommend Adobe RGB or sRGB, please read our article on this topic.
8-bit or 16-bit?
There are two most commonly used options when saving a photo: 8-bit and 16-bit. You probably already saw these options but you don’t know what they mean. Simply put, a bit is how many tones are available to each color. An 8-bit photo contains 16,000,000 colors, while a 16-bit photo has 28,000,000,000 colors. It is obvious that a 16-bit photo has more colors, so why should you ever save your photo in 8-bit?
It is desirable to edit your photo as a 16-bit file, but when it comes to printing, saving it as 8-bit is usually a good idea. Most printers don’t print in 16-bit anyway and they will automatically convert the files to 8-bit. Therefore, there is not much difference in your print’s color whether you save your photo as an 8- or 16-bit file. However, the difference is in the size of the file. The 8-bit files are smaller, and you will easily pack them and transfer them to a printer. At Shiny Prints we accept files up to 2Gb in size, so you shouldn’t worry too much about reducing file size. However, it’s something worth keeping in mind if you have to transfer a lot of files back and forth.
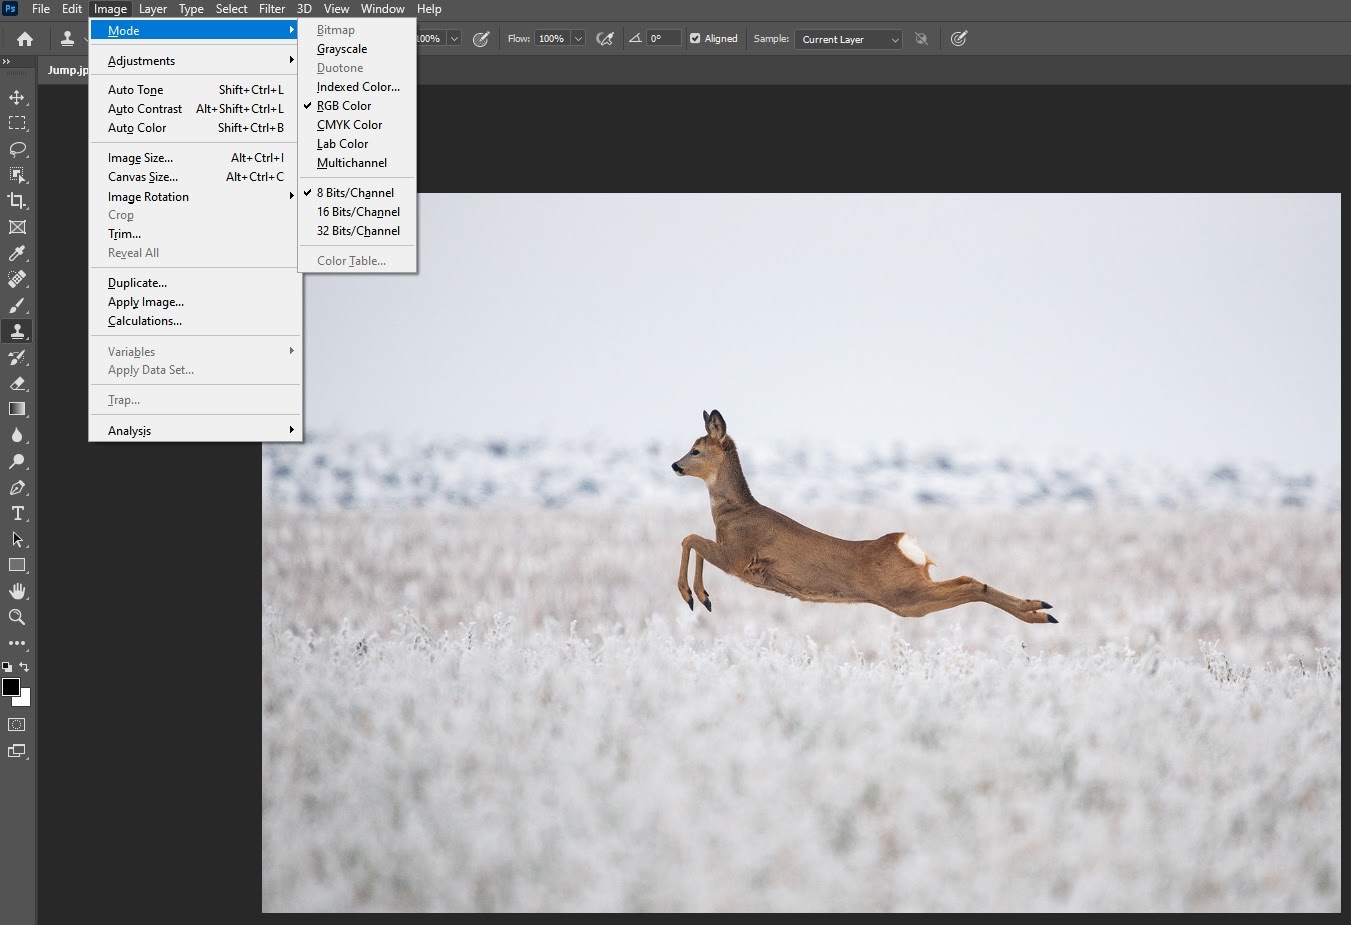
To save a photo as an 8-bit file in Photoshop, simply navigate to the “Image” tab, then hover your mouse over “Mode”, and select “8-bit.”
Resolution (PPI and DPI)
DPI stands for dots per inch. Generally speaking, the more dots you have, the more details you have. However, as a photographer, you will deal with PPI, which stands for pixels per inch. Contrary to the belief of many photographers the two are not quite the same but we’re used to using the two terms interchangeably.
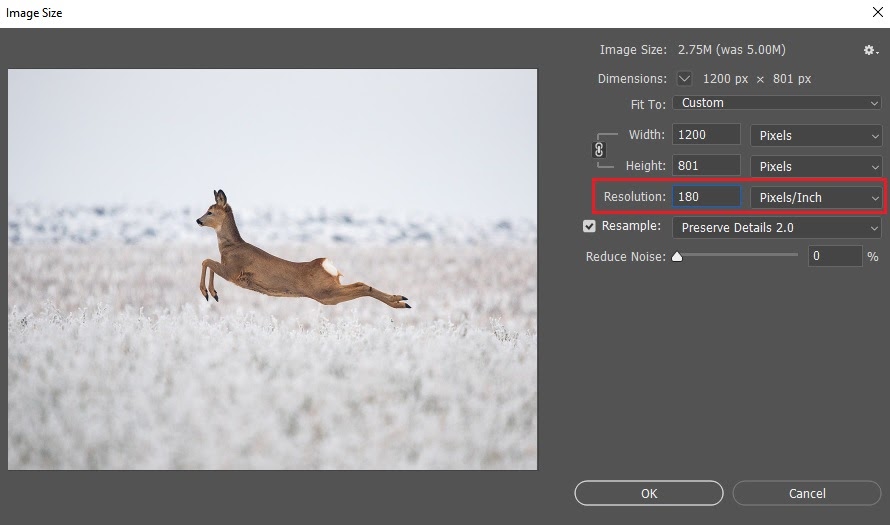
When saving a photo for print, you will have to determine the number of pixels per inch. While most photographers believe setting PPI to 300 will give the best results, our advice is to keep the resolution somewhere between 150 to 180 for most images. When it comes to printing, the difference between the two options is not noticeable, but the file you are preparing for print will be smaller and easier to work with. So, why does everyone keep telling you to always have 300 PPI? That’s because 300 PPI is ideal for paper and canvas printing. For metal printing, we use dye-sublimation printers and they work under different parameters. To learn more about resolution and metal prints, please check our article on the subject here.
To verify or change the resolution of your photo using Photoshop, navigate to the “Image” tab, and click on “Image Size”. A new window will pop up and you will be able to choose the parameters for your photo. Make sure you set the “Pixel/Inch” option from the drop-down menu.
Resize your Photo
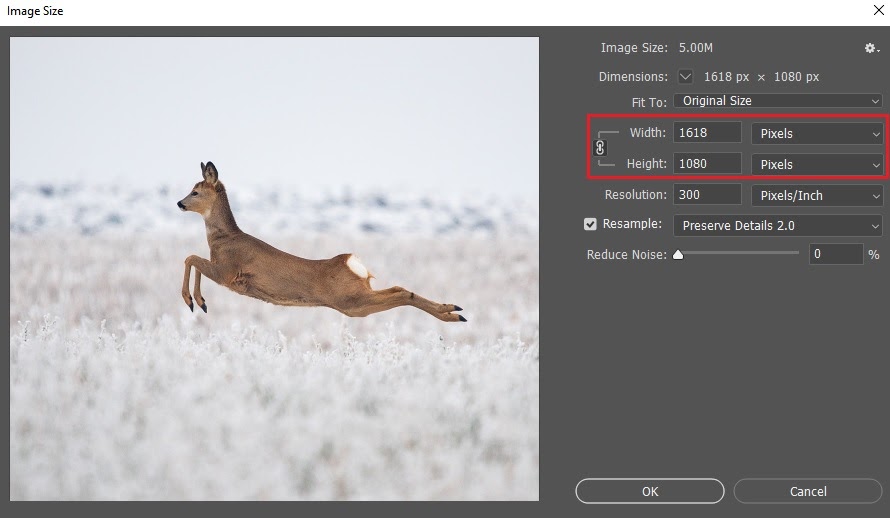
Resizing your photos may not be the most important step when preparing your photos for print unless you have to enlarge them. Enlarging photos for print, or upsampling, is an elaborate process and if you need to do it, we have a whole article dedicated to this topic. However, if you need to slightly tweak the size of your photos, it is easy to do it in Photoshop.
Navigate to the “Image” panel and select “Image Size”. You can choose to set the size values in inches, centimeters, and pixels. All you have to do is type in the numeric value of your desired size and you are done. Just make sure Preserve Details 2.0 is selected for the best results. This is one of Photoshop’s newest resampling algorithms.
Sharpen Your Photo
This is a step some photographers skip. Sharpening should always be done after cropping the image to the desired aspect ratio. What people usually forget is that sharpening for the web and print is not the same.
How much you should sharpen your photo will depend on the material you are printing on. In the case of metal prints, any excess sharpening and noise would be obvious so try not to over-sharpen your photos. No matter what program you use, if you notice zig-zag edges, you went too far.
Remember that sharpening also adds noise to photos. Each program has different algorithms for sharpening, and the trick is to find the one that suits your work. Photoshop might have a more complicated sharpening workflow as it gives the best results when you manually mask the areas which you want to sharpen. Lightroom’s sharpening tool is easy to use, and you can choose to sharpen the whole photo or only some of its parts (with the use of a brush). Then you have specialized tools like Sharpen AI that use machine learning algorithms to sharpen your image at the push of a button. Whatever tools you use, pay attention to the amount of noise generated because it can be quite noticeable on a metal print.
Soft Proofing
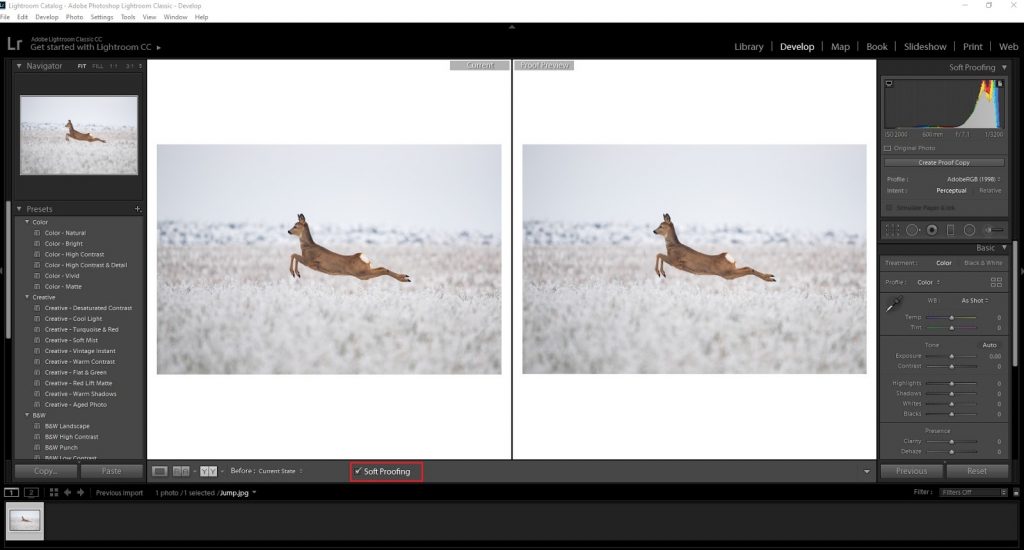
Soft proofing is a process you can apply to your photo to visualize how it would look printed. Then you can go back to the editing panel and adjust parameters such as saturation, brightness, and contrast. All photography-related programs should have this option and they will also allow you to choose different color spaces and printers or to make your own presets. Select the correct printer and color space for the most accurate results.
Soft proofing is added to many photography programs to replace the old technique of Hard Proofing. The Hard Proofing method is still used by some photographers, but it is time-consuming and it can be expensive. It involves printing the photo to see how it looks like, so you can adjust the editing parameters with higher accuracy. We highly recommend the soft-proofing process and you can read more about it in our soft proofing guide.
Using Lightroom, you can split your screen to display the original photo and then make adjustments to the Proof Review photo to see the changes compared to the original. To enter Soft Proofing mode in Lightroom, just select the photo you want to print and switch to the Develop Module. Look for a “Soft Proofing” checkbox under your photo and click it.
Final Thoughts
Seeing your photo printed on metal is one of the most rewarding experiences a photographer can have. Frame it, hang it on the wall, or prepare it for your exhibition! Creating a perfect print is not an easy job, but with a bit of help and guidance from Shiny Prints, you don’t have to be an expert either. Let us turn your photos into art that will last you a lifetime!