Best Lightroom Export Settings for Printing
If you’re a photographer, chances are you have already printed some of your photos on paper or canvas and you know how awesome it feels to hold one of them in your hands. Sure, digital media is all around us and we are used to seeing digital photos every day. However, some photographs are truly meant to be printed and the most special ones deserve to come to life as metal prints.
A high-quality metal print depends on many factors, one of them being the export settings. This aspect is under your control and you can improve the quality of your prints by making sure you use the appropriate settings for printing. This article will teach you how to export your photos for print using Lightroom since this is the software that most professionals use for this task. If you prefer another program, like Photoshop, for example, the process is quite similar, so you can use this article as a general guideline.
The right export settings can make a difference
Many photographers already use Lightroom for editing and post-processing, however, most inexperienced photographers are satisfied with exporting their photos for Facebook or Instagram. The problem here is that when they try to print these photos, much of the quality is lost and the resulting print is quite unsatisfying.
Exporting images for online platforms, even for websites, is not the same as for print. Keep in mind that all online platforms need to load your images, and to do it fast (nobody likes slow loading images and webpages), the photos have to be compressed. As a result, a lot of detail and raw data is lost. On the other hand, to export images for print, you want to avoid compression and save all the valuable information inside the photo file.
That being said, we will show you how to use Lightroom to get the right dimensions, pick the right color space, select the image format, set the resolution, and export your photos properly. Let’s get started!
Set the Correct Dimensions
The first thing you should pay attention to is the size of your desired print and if your photo’s dimensions match it. For example, if you want to create an 8×10 metal print your aspect ratio should be 5:4. Or, if you want a 50×50 square print, the aspect ratio will be 1:1. An image’s aspect ratio is simply the ratio of its height and width. There are various online aspect ratio calculators that can help you get the right ratio based on the dimensions of the print.
To set your photo’s aspect ratio in Lightroom, open the desired photo in the “Develop” module, then navigate down to “Crop Overlay”. This is where you usually end up when you want to crop your photos, but if you look to the right side of the panel you will see a lock symbol. Right next to it you’ll find the aspect ratio value of your photo (or “As Shot” if you didn’t change anything beforehand). You can click on arrows to set a different value.
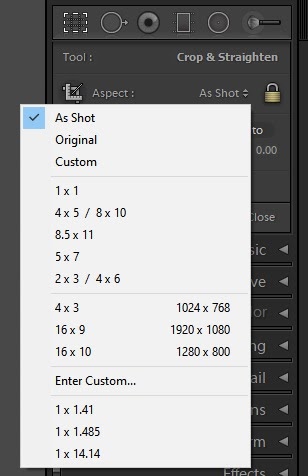
As you can see in the image above, there are a number of aspect ratios you can choose from, but there is also the option to enter your own. Simply check the “Custom” option and Lightroom will let you enter your desired aspect ratio.
Setting the correct aspect ratio is the only thing you will do in the “Develop” module while exporting your photos for print. The rest of the export process will be done in the “Export” window. To navigate to that window, click on “File” in the upper left corner. Then navigate down until you see “Export…” or simply press Ctrl+Shift+E on your Windows PC or Command+Shift+E on a Mac.
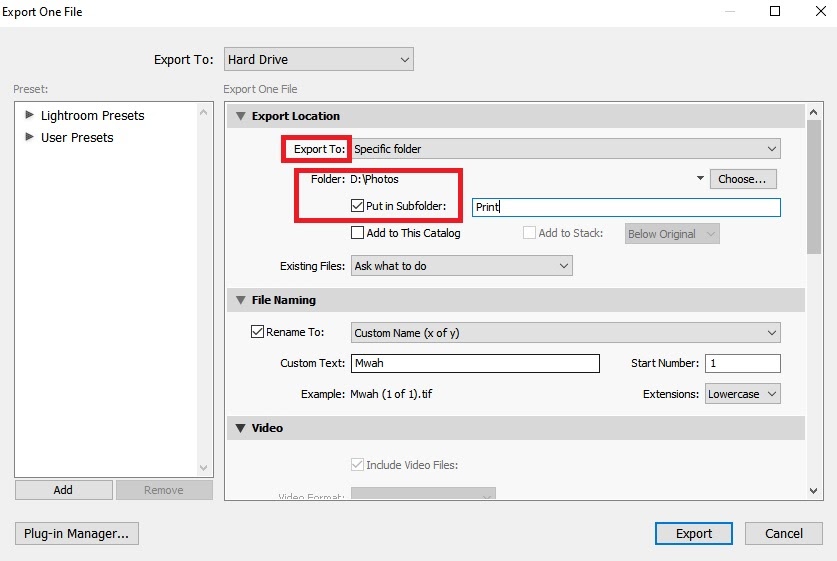
Select the Export Location
First things first, you need to choose where Lightroom will save your photo. This is a minor detail, being organized is key to any photographer. You can select the specific folder, or you can allow Lightroom to save your photos in the same folder where the original image is. It can even create a new subfolder that you can rename right there in the “Export” window. There are more options to choose from, but they are quite self-explanatory. However, we advise you to create a new folder and give it a descriptive name. This way you will always know where your final print-ready photo is and avoid any unfortunate mistakes.
Color Space
When you print an image, you want the colors to match what you see on your monitor. Otherwise, it wouldn’t be quite the same photo. This is where the color space comes into the equation.
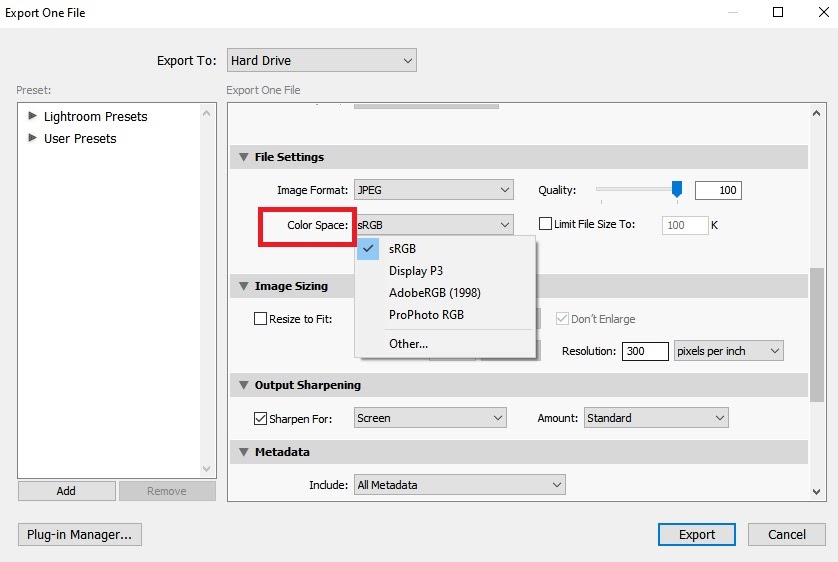
Most photographers edit their images for the web. After all, most of us consume digital media every day. However, when it comes to printing, the range of colors you get on your monitor is different from what you get in print. To fix that, we advise you to choose the Adobe RGB 1998 color space when exporting your images. sRGB is also an acceptable option, but Adobe RGB 1998 offers the widest range of colors.
To change the Color Space in the “Export” window, navigate to “File Settings” and choose the desired Color Space from the drop-down menu as seen in the following image.
If you want to learn more about color models and color spaces, you can read more about the topic here.
Image Format
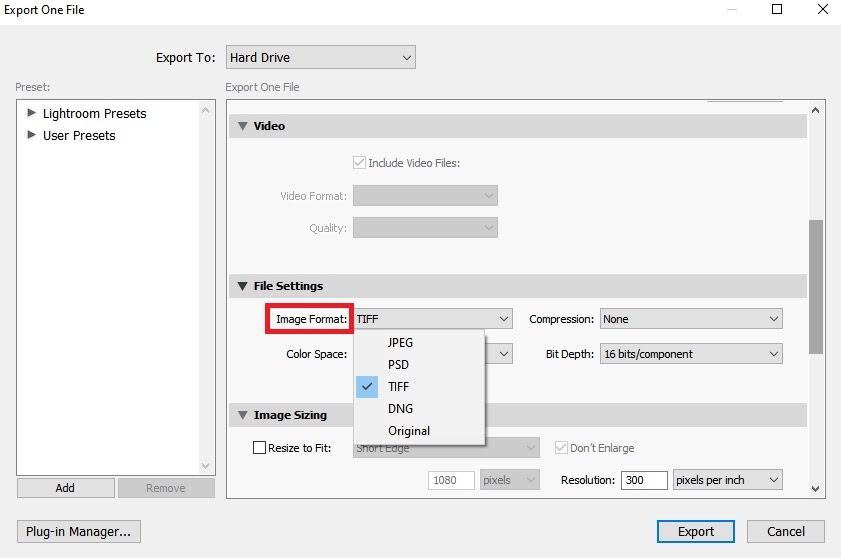
The next important setting is the image format. The typical formats for prints are JPEG and TIFF. Both are acceptable, but if you want a very large high-quality print, TIFF is usually the better option. This is because this file format has more information than a JPEG file and will give better results.
To change the file format, simply click on the “Image Format” drop-down menu as seen in the image below.
Resolution (PPI)
When photographers talk about image resolution they usually refer to PPI (Pixel per Inch), because that is how the resolution is measured. However, at the printer level, we’re talking about Dots per Inch or DPI. One dot can contain many pixels or one pixel can contain many dots. PPI and DPI are two different terms, but both of them tell us something about image quality. As a photographer, you’re probably more accustomed to PPI.
You probably already heard some advice from other photographers out there, including that for prints you should always set the value to 300 PPI. This is somewhat true for standard printing methods, such as laser printing. However, for metal printing, we use dye-sublimation printers that operate differently.
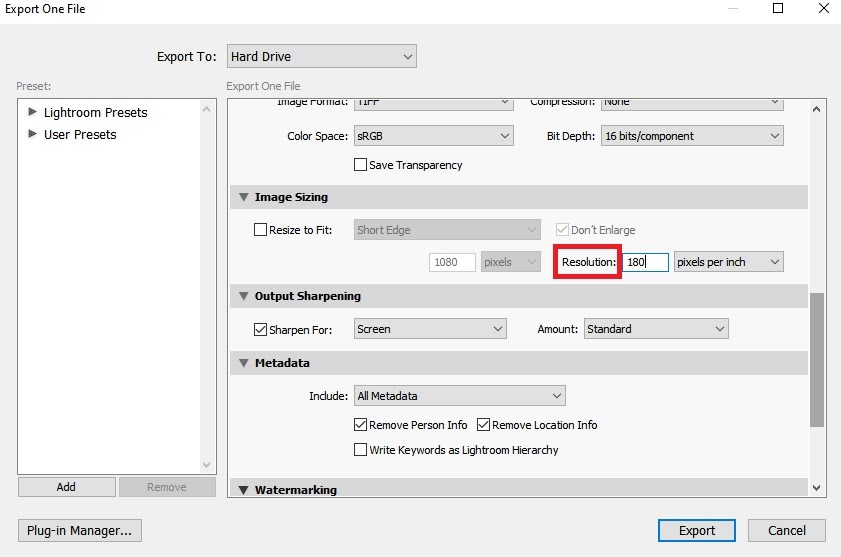
We prefer to set the value of PPI at 180 because there is really no difference in the quality of the metal print. You won’t benefit from setting the value at 300 PPI, although you won’t lose anything either. The file will simply be larger.
If you want to learn more about this topic, you can read our article on the ideal resolution for metal prints.
Keep in mind that 180 PPI is the most optimal resolution for metal prints in general, but you can go lower than that in some cases. For smaller prints, it’s ok to set the PPI value anywhere between 150 and 180 because you’re going to view them from a short distance. That being said, the bigger the print, the less PPI you need because the viewing distance increases. For example, for very large prints (48″ x 72″), you can set PPI as low as 60.
In Lightroom, you can find the PPI setting in the “Export” window, under “Image Sizing,” as seen in the image below.
As for the image size itself, you should simply uncheck the “Resize to Fit” option as this will automatically save the most optimal size for the print.
Output Sharpening
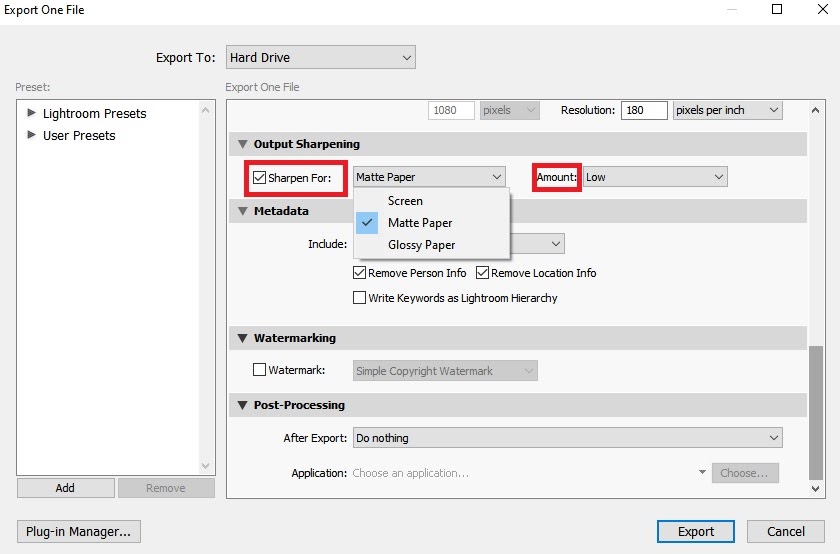
This is one of the options you will most likely disable, especially if you already sharpened your photo in Lightroom’s “Develop” module. However, if you still choose to do it, you should select “Matte Paper” or “Glossy Paper,” depending on the type of print surface. We offer Matte prints as well as Glossy prints, and you should choose accordingly.
Furthermore, you can tweak the “Amount” by setting it to Standard, High, or Low sharpening. If you choose to sharpen your photo during export, set the “Amount” on Low. This way you will add some sharpness to your photo but without risking any zigzag-like edges.
With that in mind, we still recommend you sharpen your images before exporting them. Alternatively, you can export an unsharpened image and sharpen it using a different tool, such as Photoshop or Sharpen AI.
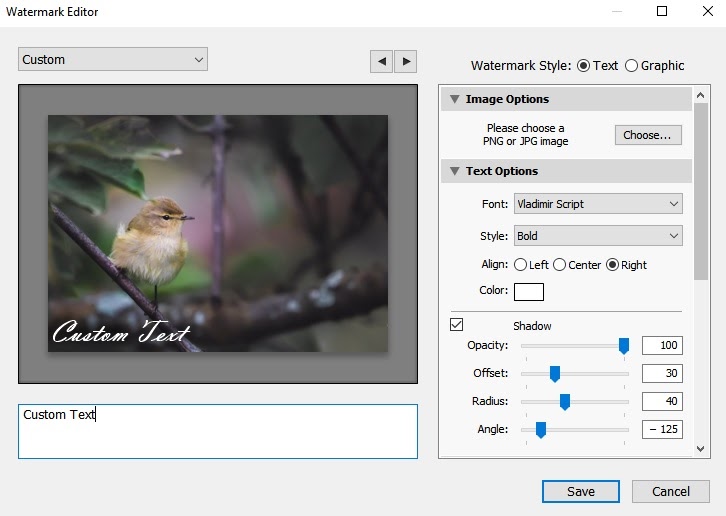
Watermarking your Print
When exporting a photo, Lightroom gives you the option to apply a watermark. Most professional photographers disable this setting because they prefer to sign their photos by hand or order our signature backstamp. Backstamps are easy to create through our online ordering wizard and can include your signature and brand logo. However, if you prefer a plain watermark, the option is there. Lightroom will allow you to choose between a simple text watermark or import your own custom-made watermark. Furthermore, you can control the watermark’s opacity, font size, and desired effects as seen in the following image.